Posted on

New no-bake Nutella cheesecake

I saw a recipe on Pinterest the other day for this no-bake Nutella cheesecake.  It sounded like a great pairing.  But, I can’t stand cool-whip.  It tastes like raw chemicals to me.   Yes, I’ve used the stuff before, but I’m trying to cut a lot of junk out of my life.  Obviously, that doesn’t mean cutting the junkfood out of my life; I’m making a Nutella cheesecake for goodness sakes  That’s not an essential, nutrition-packed recipe, now is it?

Anyway, I have amended the original recipe as follows and it is devine.  My kids loved it too.

no bake nutella cheesecake

 No-Bake Nutella Cheesecake with Oreo crust

Ingredients:

Crust:

  • 12 oreo {or oreo-like} cookies
  • 3 Tbsp butter, melted

Filling:

  • 8 oz cream cheese, softened
  • 2/3 cup Nutella
  • 1 tsp vanilla
  • 8 oz whipping cream
  • 3 Tbsp crème fraîche {optional}
  • 4 Tbsp sugar

Garnish: {optiontal}

  • 1 Chocolate bar {I love the intense flavor of a 70% cacao dark chocolate bar, but you can use whatever is your favorite.}
  1. In a food processor, blend the oreos until they turn to a fine powder.   In a bowl, combine the oreos and the melted butter until they clump together.  Spread the mixture on the bottom of an 8″ or 9″ pie pan.  Make sure that you have a thin layer all the way around.  {My crust was thin and did not go up the sides of the pan.}  Set aside.
  2. In the same bowl as you made the crust, add the softened cream cheese and Nutella.  Mix with a hand mixer until well blended.  Add the vanilla and mix again.  Set aside.
  3. {You do not have to clean the beaters from the Nutella mixture.} In another bowl, whip the whipping cream, crème fraîche and the sugar to fairly stiff peaks.  Be careful not to make butter though.
  4. With a rubber spatula, fold the whipped cream mixture into the Nutella mixture until there are no more white streaks.  It makes a lovely mocha-colored mixture.
  5. Add the Nutella cream mixture to the oreo crust.  Even out the top and chill about two hours before serving.
  6. If you’d like to make it fancy, grate a chocolate bar and sprinkle it on top.


New no-bake Nutella cheesecake

Recipe Type: Dessert
Cuisine: Chocolate
Author: Ginger Hansen
Prep time:
Cook time:
Total time:
Serves: 8
Scrumptious No-Bake Nutella Cheesecake with Oreo Crust
Ingredients
  • 12 oreo {or oreo-like} cookies
  • 3 Tbsp butter, melted
  • 8 oz cream cheese, softened
  • 2/3 cup Nutella
  • 1 tsp vanilla
  • 8 oz whipping cream
  • 3 Tbsp crème fraîche {optional}
  • 4 Tbsp sugar
  • 1 Chocolate bar {I love the intense flavor of a 70% cacao dark chocolate bar, but you can use whatever is your favorite.}
Instructions
  1. In a food processor, blend the oreos until they turn to a fine powder. In a bowl, combine the oreos and the melted butter until they clump together. Spread the mixture on the bottom of an 8″ or 9″ pie pan. Make sure that you have a thin layer all the way around. {My crust was thin and did not go up the sides of the pan.} Set aside.
  2. In the same bowl as you made the crust, add the softened cream cheese and Nutella. Mix with a hand mixer until well blended. Add the vanilla and mix again. Set aside.
  3. {You do not have to clean the beaters from the Nutella mixture.} In another bowl, whip the whipping cream, crème fraîche and the sugar to fairly stiff peaks. Be careful not to make butter though.
  4. With a rubber spatula, fold the whipped cream mixture into the Nutella mixture until there are no more white streaks. It makes a lovely mocha-colored mixture.
  5. Add the Nutella cream mixture to the oreo crust. Even out the top and chill about two hours before serving.
  6. If you’d like to make it fancy, grate a chocolate bar and sprinkle it on top.
no bake nutella cheesecake 2web
It’s worth making this mess


Posted on

Am I hot or cold?

The answer is: I am fickle.  And so are you, I’d bet.  When it’s cold outside {like now}, we dream of the warmer days at the pool or barbecues on someone’s back porch.  And then we’re reminded of the endless swim meets, of the thick wall of heat that greets you when leaving the house, of the crazy electric bills from the blasting AC, and that that infernal barbecue is at your weird neighbor/co-worker/uncle/fill in your blank’s house.  So, in those sultry, languid months of, say, July or August, our faintly faithful hearts begin to yearn for winter.

Will we ever be content?

To celebrate and engage those wishy-washy pangs, I am uploading some hot and cold photos.

You get what you get and you don’t pitch a fit.  That’s what my son’s teacher says {and I know she’s already thinking about Spring Break.}  SPL

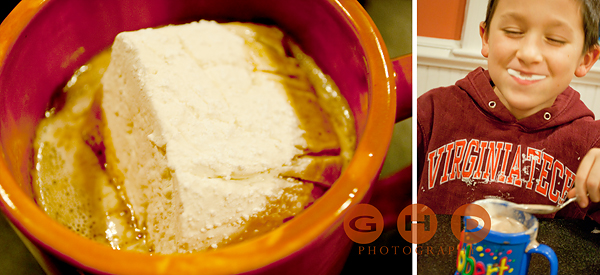
Homemade peppermint marshmallows and real deal hot chocolate.  Want the recipe?

Whew!

Posted on

Top Food Movies

My family has been obsessed with food since forever. We’re Italian and that’s just the way it is. We have clung to several delectable traditions of our Italian forebears, but have also branched out into all types of food preparation. The things that I value most from my Italian heritage is our appreciation of food, innate hospitality and dedication to family.

We also love movies. That I have no real genetic reason for, but it’s there. We all seem to love a good flick.

So to feed our predilections, we have started a family collection of food movies. Here are the top 10 in no real order.

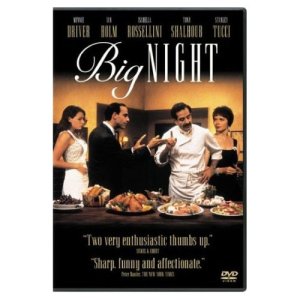
  1. The Big Night (Ok, so this is probably my favorite one, but the others aren’t in order.)
  2. Eat, Drink, Man, Woman
  3. Tortilla Soup (Same plot as Eat Drink, but a different culture)
  4. Julie and Julia (our most recent entrant)
  5. Babette’s Feast
  6. Ratatouille (great for the next generation)
  7. Mostly Martha (No Reservations is the American version that I have not seen yet.)
  8. Chocolat
  9. Woman on Top
  10. Like Water for Chocolate

Fried Green Tomatoes can also be a good honorable mention.
The French film, Delicatessen, might turn your stomach, but has great sardonic humor. Maybe with a side of Sweeney Todd.
I have not seen it, but I have heard that Tampopo is good.

Posted on 1 Comment

Rolling with the fondant

So here is my first attempt at a fondant cake. Fondant is actually easy to make; it’s not as easy to make it look like something.

I was worried that it would taste awful. It’s made with marshmallows and confectioners sugar. Yes, sugar and more sugar. But, it was really edible and not so thick that you couldn’t put a fork through it. But, buttercream is still my preference for tastiness.
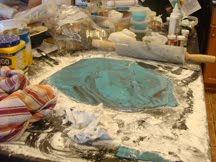
The cake was good too. Under all of that icing, it stayed nice and moist. I was shocked, because a lot of fondant cakes I’ve had in the past have been very dense with a hint of dry-as-a-bone texture.

I was completely covered in cornstarch, powder sugar and food dye by the end.

More photos:


www.whatscookingamerica.net/PegW/Fondant.htm This is a link to the website that guided me.

I also like this cake website for ideas. www.easy-cake-ideas.com Let me know if you have any favorites.

Here’s the recipe for homemade marshmallow fondant:
Marshmallow Fondant
16 ounces white mini-marshmallows (a bag may only be 10.5 oz.)

2 to 5 tablespoons water

2 pounds confectioner sugar

Vegetable shortening (you’ll need about 1/4 cup to coat your hands and work surface)

  1. Melt marshmallows and 2 tablespoons of water in a double boiler or microwave: Put the bowl in the microwave for 30 seconds, open the microwave and stir, put it back in the microwave for 30 seconds more, open the microwave and stir again, and continue doing this until its melted. It usually takes about 2 minutes total. Place 3/4 of the powdered sugar on the top of the melted marshmallow mix.
  2. Now grease your hands GENEROUSLY (palms, backs, and in between fingers), then heavily grease the counter you will be using and dump the bowl of marshmallow/sugar mixture in the middle.
  3. Start kneading like you would bread dough. Keep kneading; it’s sticky at this stage! Add the rest of the powdered sugar and knead some more. Re-grease your hands and counter when the fondant starts sticking. If the mix is tearing easily, it is to dry, so add water (about 1/2 tablespoon at a time and then knead it in). It usually takes about 8 minutes to get a firm smooth elastic ball so that it will stretch without tearing when you apply it to the cake.
  4. It is best if you can let it sit, double wrapped, overnight (but you can use it right away if there are no tiny bits of dry powdered sugar). If you do see them, you will need to knead and maybe add a few more drops of water.
  5. Prepare the fondant icing for storing by coating it with a good layer of Crisco shortening, wrap in plastic wrap and put it in a re-sealable bag. Squeeze out as much air as possible.
  6. Marshmallow Fondant icing will hold very well in the refrigerator for weeks.

The recipe for good buttercream icing can be found in another post. Click for BUTTERCREAM LINK.